Falkon Extension Development: Implementation Guide
A practical guide to building Falkon from source and creating a Python-based extension using PyFalkon.
Monday, January 26, 2026 · 2 min read
This guide documents the successful setup of a custom-built Falkon Browser with Python plugin support, along with deploying a minimal Hello World extension prototype.
It is intended as a reference guide for developers who want to compile Falkon from source and experiment with Python-based extensions.
Note: The steps below were tested on Arch Linux (standard version). Other distributions may require minor adjustments.
Guide Overview
The primary goal was to build Falkon from source to ensure the PyFalkon (Python bridge) was correctly linked. This enables the development of Python-based extensions such as custom tooling, automation, or experimental features like an XMPP client.
Compiling Falkon from Source
Compiling from source ensures that Falkon and its Python bridge are built against the same system headers and libraries.
Prerequisites
-
Qt Framework
qt5-webengineqt5-toolsqt5-base
-
Python Tools
python-pyside2shiboken2
(Required for Python ↔ Qt bindings)
-
Build System
cmakeextra-cmake-modules
Build Steps
1. Initialize the build directory
mkdir build && cd build
cmake ..
2. Compile:
make -j$
Extension Architecture
Falkon extensions require two primary files contained within a unique folder.
Folder Location
For custom builds, the browser prioritizes its own binary path:
~/falkon/build/bin/plugins/hello_python/
A. The Metadata Descriptor (metadata.desktop)
This file registers the extension with the Falkon plugin manager.
[Desktop Entry]
Name=Hello Python World
Comment=My first Python extension for Falkon
Icon=utilities-terminal
Type=Service
X-Falkon-Type=Extension/Python
X-Falkon-Author=Shibe
X-Falkon-Version=1.0.0
X-Falkon-Settings=false
Key Constraint: X-Falkon-Type must be exactly Extension/Python to appear in the correct category.
B. The Entry Point Script (init.py)
This file contains the logic that runs when the extension is toggled.
import Falkon
from PySide2 import QtCore

class HelloWorldPython(Falkon.PluginInterface, QtCore.QObject):
    def init(self, state, settingsPath):
        # This code runs when the extension is enabled
        print("--- Hello World! ---")

    def unload(self):
        # This code runs when the extension is disabled
        print("Extension Unloaded")

    def testPlugin(self):
        return True

Falkon.registerPlugin(HelloWorldPython())
4. Launching and Verification
Because the binary is not installed to system paths, specific environment variables are used to “kickstart” the Python engine.
Execution Command
Run this from the build directory:
export FALKON_PLUGIN_PATH=$(pwd)/bin/plugins && ./bin/falkonFinal Activation Steps
-
Launch: Execute the command above.
-
Verify Init: Check the terminal for
Falkon: Python plugin support initialized. -
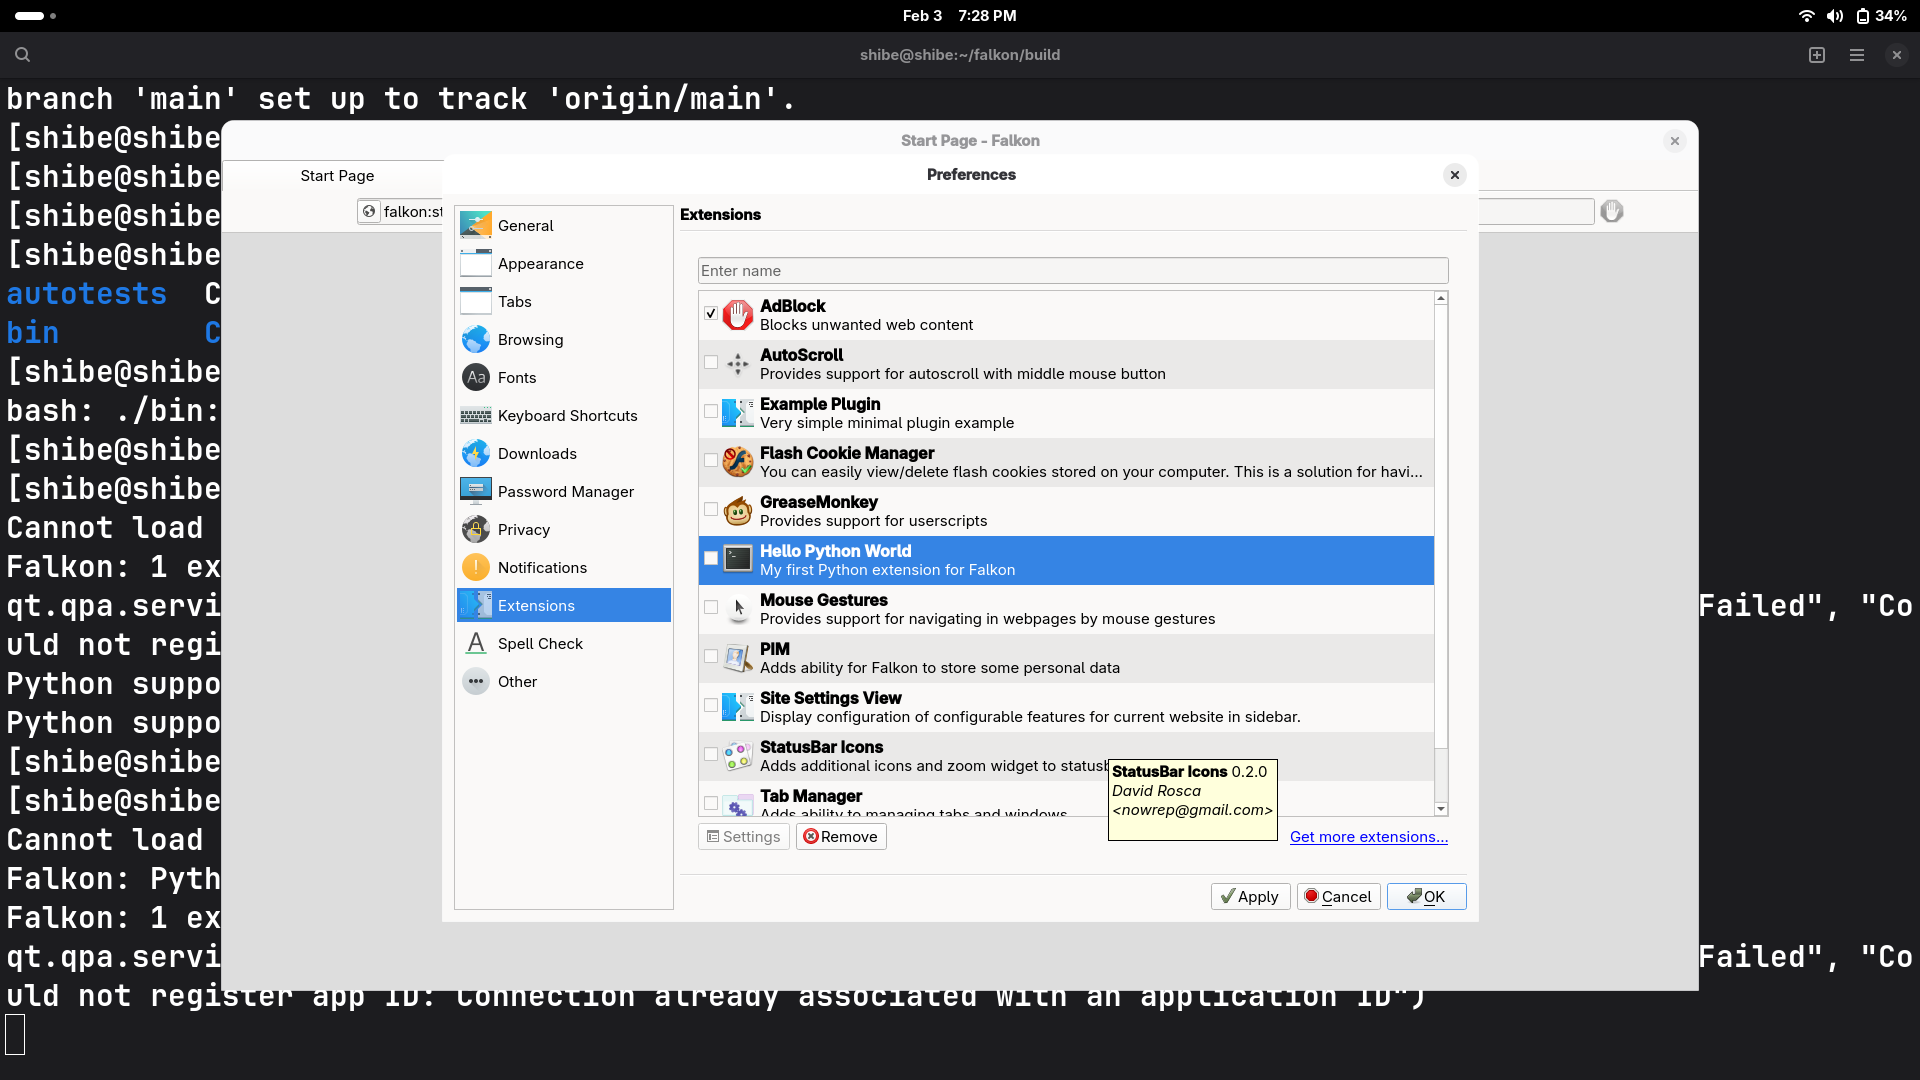
Preferences: Open Preferences > Extensions in the browser.
-
Enable: Locate “Hello Python World” and check the box.
-
Output: Look at the terminal to see your
--- Hello World! ---printout.
Credits
This tutorial is based on and inspired by the excellent Falkon Python extension guide by SGOrava.
Original tutorial:
link